Friday, December 23, 2011

Gluten free bread, made easy by Angie!


As you might have guessed, I’m on honeymoon. I have also decided to take a much needed break from the kitchen and from any major online activity. Before I left, I did however, ask a few respected foodie friends and family to contribute guest blogs for me while I was away.

Today, I am posting a blog written by Angie Morrison, of SOMETHING DIFFERENT. She creates a line of unusual goodies such as green tomato chutney, sugar-free strawberry jam, rocket and cashew pesto (made with rocket from her garden J) and whisky marmalade. She is also a busy mother of two and her journey with gluten free bread baking has really caught my attention.

Gluten free baking is fiendishly difficult, but the gluten free living trend also seems to be becoming more and more mainstream nowadays. Angie’s recipe seems, on the other hand, to be really easy (as long as you have the right ingredients) and she has been gracious enough to share it with us.

Angie’s story and recipe

One innocent two-friends-having-breakfast-and-a-gossip some time ago, my friend revealed to me, as I was slathering some butter over my warm toast, that she had recently been diagnosed with a gluten and dairy intolerance. She was terrified of having to have to live a life without all her favourite foods - pasta, cake, cappuccinos, pancakes, muffins and worst of all, BREAD. In a moment of genuine concern for my friend I promised I’d help her out. In the famous words of Jeremy Clarkson “How hard can it be?”…

Six months and many tears of success and failure later, I have come to terms with just how hard it really is to make a decent, non-dairy, gluten free bread. Initially I researched the concept, like what was gluten and why was it so important for bread. It is literally the “glue” that holds the bread together.

So how do we overcome this? Firstly I had to learn a whole new language that makes up the gluten free world - guar gum, millet flour, tapioca starch to mention a few of the alien ingredients that are essential to successful gluten free baking.

And milk substitutes? Soy milk (sometimes not so yum), rice milk (which I learnt recently can have gluten in from the maltodextrin. Sigh!) and almond milk. Butter is replaced by oil (canola or olive), so now we are ready to make our bread. Or so I thought. Allergies, it would seem, come in threes or MORE. My friend couldn’t have soy or yeast either. What did I get myself into?

As a result of much experimenting I have finally come up with a couple of working recipes, one of which is truly a very tasty dairy free, yeast free, gluten free buckwheat bread. Despite its name, Buckwheat has no relation to wheat at all, but is related to rhubarb, the seed of which is ground up to make a wonderfully silky nutty flour. It has now become so popular I have started baking bread to order and also do premix packs complete with instructions.

Anyone who would like to contact me can do so at SDbyAngie@gmail.com. I welcome any suggestions and challenges.

So, six months later my friend is overjoyed that she can eat bread again. Now to make a gluten free, dairy free Red Velvet cake for her birthday… Oh Boy!


Gluten Free Buckwheat Bread

1 ½ cups of gluten free plain flour (see notes)
½ cup of buckwheat flour
1 tsp bicarbonate of soda
2 tsp cream of tartar
½ tsp salt
2 Tbsp castor sugar
½ tsp xantham or guar gum
2 egg whites
1 cup reduced fat milk or milk substitute of choice
1/3 cup canola or olive oil
3-4 Tbsp seed mix (flaxseeds, sunflower seeds, sesame seeds, pumpkin seeds to personal taste)

Preheat oven to 180˚C and grease a medium loaf pan. Sift together the gluten free flour, buckwheat flour, bicarb, cream of tartar, salt and stir in the sugar. Beat the egg whites until just frothy, and stir in the milk and the vegetable oil. Pour the egg white mixture into the flour mixture and beat for 2 minutes or until smooth. Pour the batter into the pan, and press the seed mix lightly into the batter. Bake for 40-50 minutes or until a skewer inserted in the middle of the bread comes out clean.

Notes:
For the gluten free plain flour you can use the Glutagon Plain Flour or this mix:

Angie’s bread flour mix 1:
1 cup brown rice flour
1 cup millet/sorghum flour
2/3 cup tapioca starch
1/3 cup cornstarch

Sift all together at least 3 times. Store leftover flour air tight container in the fridge or freezer.

Sunday, December 18, 2011

Perfect imperfection.


I am sitting in the car as I write today’s blog. Adam and I are on our way to Knysna and this feels like the first time I have had the mental space and physical time to write, in at least two weeks. As some of you know Adam and I finally got married last week.

we got engaged a year and half ago and have been working out how we could get married with as little fuss and stress as possible. Having worked in the hotel and events industry for 10 years I do not labour under any illusions that traditional weddings are glittering magical blissful days.

We had played with various options this way and that (I even won a wedding for 20 people fully paid for) but all our considerations ended up back at the same place. Just him and I, two witnesses and a minister. And we almost got it right!

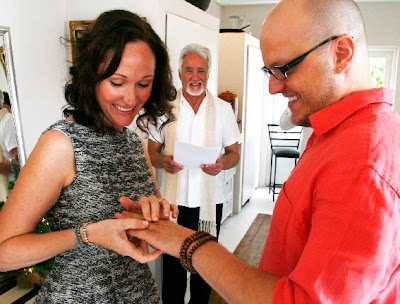
We got married on the morning of the 10th of December at our home with Adam’s brother and my sister as witnesses, a fabulous interdenominational minister and at the last minute a few dads, a skyped in mother and another brother. There was a lot of laughter, some very comical situations, beautiful words, tears and so much love.


We then nipped out for brunch with our two witnesses to our favourite eating space, Starlings. Adam and I then spent a few hours alone adsorbing the gravity of the bond we had just forged, while family and friends gathered at my sister’s house waiting to celebrate with us in the afternoon.

We were met by masses of bubbly, flowers, smiles, gifts, music, laughter, dancing and great food. It was the perfect amount of crazy happy to end off the reflective intimate morning. Echoing the words of the minster at our marriage – a perfectly imperfect day!

Thursday, December 1, 2011

Chermoula and coconut milk baked fish


I developed this recipe earlier this week after a client requested a saucy fish dish. I was inspired after last weeks Moroccan explorations, so I decided to experiment with a chermoula, but I love the combination of coconut milk and fish too so I thought combining the two might be fun. I then saw a great recipe on Martha Stewart's website with braised leeks and tomato with fish... and hey presto, this recipe was born. Not much else to say other than both times I have cooked it now, it has met with roaring enthusiasm by it's eaters (and me).

Oh yes, I bet many of you are wondering what on earth chermoula is... it's a spicy herby lemony Moroccan sauce which is great with fish, chicken and veggies. I imagine it would be awesome as a condiment with red meat or added to a marinade. Add a few spoons to a steak sandwich for a flavor sensation! It would probably be great in a salad dressing too.

So in other words make double what the recipe calls for below and keep the other half in jar in the fridge!


Chermoula coconut milk baked fish
Serves 4 - 6

For the Chermoula

2 cloves of garlic, roughly chopped
1 Tbsp of smoked paprika
½ Tbsp of ground cumin power
2 tsp of fresh ginger, finely chopped
½ tsp of fresh chilli, finely chopped
A pinch of saffron
½ tsp of ground coriander
3 Tbsp of lemon juice
¼ of a preserved lemon, fruit removed and roughly chopped
½ tsp of salt
15g of fresh coriander, leaves and tender stems only, well washed
10g of flat-leaf (Italian) parsley, leaves and tender stems only, well washed

Combine all ingredients, except the herbs, in a blender and blend until a thick, moderately rough sauce is formed. Add the herbs and blend to combine but allow there to be quite a bit of texture left in the herbs.

Remaining ingredients

2 Tbsp of olive oil
300g of leeks, thinly sliced
Salt and pepper to taste
4 plum tomatoes, sliced lengthways into thick slices
4 – 6 portions of firm flaky fish of choice, cut into medallions
½ a 400g tin of coconut milk or cream

In medium sized not stick pan, heat the oil and fry the leeks until tender. Add a dash of water if the pan becomes too dry. Season with a little salt and pepper.
Pre heat your oven on grill and place the wrack in the middle of the oven. In a medium sized casserole dish scatter the leek even in the bottom of the dish. Lay the tomato slices onto the leeks and top each slice with a dollop of chermoula. Place this in the oven and grill for about 5 - 10 minutes.

Pat your fish dry and lightly salt and pepper each medallion. Combine the coconut cream and remaining chermoula. Remove the casserole dish from the oven and place the fish onto the tomatoes. Pour the coconut mixture over the fish and bake in the oven for 10 – 20 minutes depending on the size and thickness of the fish.

Allow the dish to rest for 5 minutes before serving with rice, potatoes and a salad.

Wednesday, November 30, 2011

Sorbet in seconds (and sugar free)


So I had some left over fruit salad in the freezer and it's a nice hot day and I'm tiered after a long day and felt like something refreshing. Sorbet!

I broke up about a cup of the frozen fruit (which was strawberry, paw paw and orange) with a knife into smaller pieces. I added a 1/4 cup of maple syrup (you could also use honey, golden syrup or agave nectar). I added two sachets of the new aspartame free Canderel, 1/4 cup of lemon juice, 1/4 cup of water and blended it up with my stick blender. It took a little work to get through the frozen fruit but with a gentle bouncing rhythm and a bit of stirring it around with a spoon it transformed into the perfect soft sorbet to be eaten right away.

For a firmer sorbet, you could freeze it for 30 minutes or so. If it is fully frozen you would need to leave it out the freezer for 15 minutes or so for it to soften before serving it. This would also be perfect to pour into kids ice lolly shapes and freeze.

Never throw left over fruit salad or fruit which is about to turn, away. Peel it, chop it and freeze into a smaller portions for smoothies or sorbet or daiquiris.


Monday, November 28, 2011

I could not be truly happy without pesto in my life

Picture care of Walter Köppe

We all go through fads, phases and fancies but some things we simply can never truly get enough of. Traditional basil pesto is one of those things for me. Even if I don't want to eat pasta pesto every night, having a jar of pesto in the fridge to add to a salad dressing, onto a sandwich, into a sauce, stew or soup will never get old for me. It is the one condiment which improves pretty much any dish it is added to. It compliments so many flavours and I have yet to meet the person who can honestly say that they do not like pesto (given that it is the real deal and not some crappy knock off, of course).

We are blessed these days to be able to find quite a few fabulous stores bought pestos, my personal favorite being Pesto Princess. But if you have not made the real thing yourself before, or perhaps just haven't found a great recipe. Give this one a try. I think it's pretty good.

Basil Pesto

Makes about 250ml

40g of pine nuts or macadamia nuts

1 large clove of garlic

125ml of good olive oil

40g of parmesan cheese (or similar – pecorino, grana padana)

1 Tbsp of lemon juice (more if desired)

2 tsp of lemon zest, finely grated

100g of fresh sweet basil

Salt to taste

Blend the nuts, garlic, olive oil and cheese together to form a paste. Add the basil and blend until just fine, but don’t over blend. Add salt to taste.


Other recipes on this blog with pesto

Pesto lasagna

Pesto and tomato tart

Pesto and cashew burger patties

Baked potato with chicken and pesto topping


Friday, November 25, 2011

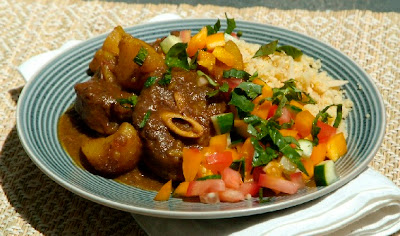
Lamb curry


While I was in Joburg I got this recipe from a client of mine and yesterday was the day to make it as I wanted to teach it today.Wow, what an awesome curry, yesterdays was great but today's was unbelievable. My client has a contact for the most amazing free range karoo lamb. She has promised to send me the details - will tweet and FB the details as soon as I have them.
Okay - enough adjectives for one day - if you like lamb, curry and/or stew you have to make this. Leave out the chilli if you're not into hot food - all the other spices are mild. I added a side salad of chopped up tomato, cucumber and yellow pepper and it was lovely. A combo of chopped basil and mint make a great alternative to fresh coriander as a garnish.

Lamb Curry

Serves 6

Whole spices

1 star anis

1 stick of cinnamon (about 5cm long)

½ tsp fennel seeds

3 cardamom pods

2 cloves

¼ cup of oil

1large onion chopped

Powdered spices

2 Tbsp of garam masala

1 tsp of ground coriander

1 tsp of chilli powder (optional)

2 tsp of turmeric

2 large tomatoes, chopped

1 kg of lamb, cut into stewing sized pieces

4 cloves of garlic, chopped

2 tsp of ginger, minced

4 curry leaves

½ a cup of rich beef stock

2 large potatoes, peeled and cut into bite sized pieces

Salt to taste

Fresh coriander leaf, to garnish

Heat the oil in a medium sized pot on high heat and fry the onions with whole spices until translucent (see through). Add the powdered spices and fry for a minute or two.

Add the tomatoes and combine well. Add the lamb, ginger, garlic and curry leaves. Drop the temperature to low heat and simmer for an hour or until the lamb is tender.

Add the stock and potatoes and cook until the potatoes are cooked through, about half an hour to 45 minutes. Add a little salt if needed.

Top with fresh coriander and serve with rice or couscous.

Wednesday, November 23, 2011

Moroccan chicken, lime pickle and green olive tagine


A client has asked me to teach her housekeeper to cook with her tagine. Now I am embarrassed to say that I have cooked many tagines, but not in an actual tagine. I also have a tagine standing very decoratively in my collection sadly gathering dust! So what a great excuse to dust it off and give it the love it has been lacking for so long while I make sure that I can teach this technique with confidence.

The one Morocco dish I fell in love with years ago was the chicken with preserved lemons and green olive. What a spectacularly unique (at least in our South African kitchens) set of flavours. So this is the dish I christened my tagine with today and the result were succulency moist chicken with a salty, lemony, olivey sauce that I can't wait to mop up later with loads of saffron and almond couscous!

In Cape supermarkets, you readily find bottled lime pickle with the other Cape Malay condiments and even though it isn't strictly speaking the Moroccan preserved lemon, it is delicious and readily available.

This dish is just as easily made in an appropriately sized casserole dish with a well fitting lid.

Moroccan chicken, lime pickle and green olive tagine
Serves 4

8 chicken thighs (with skin and bone)
3 Tbsp of Nomu Moroccan spice rub
1 Tbsp of olive oil
½ a cup of strong chicken stock
4 Tbsp of olive brine (the water the olives come in)
1 medium onion, chopped
3 cloves of garlic, chopped
2 Tbsp of fresh ginger, finely chopped
3 pieces of pickled lime skin, fruit removed from the skin and cut into thin slices
24 pitted green olives

Pre heat your oven on grill and place the rack in the middle of the oven. Mix the spices with the oil and rub onto the chicken thighs. Lie them skin side up into your tagine base on top of the chopped onions. Grill the chicken for about 15 minutes until the skin has browned. Remove the tagine and add the remaining ingredients and cover with the lid.
Place the rack at the bottom of the oven, return the tagine to the oven and reduce the temperature to 160˚C on all round heat. Bake for 45 minutes.
Remove the dish from the oven and allow it to cool with the lid on for a further 30 minutes before serving with saffron and almond couscous.

Tuesday, November 22, 2011

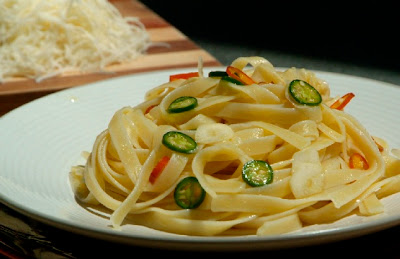
Spaghetti Aglio, Olio e Peperoncino

I can’t believe it has taken me so long to write about this dish, but I realised the error of my ways after I made it last night as the focal dish in my step mothers birthday dinner. I did this, as this pasta is a dish I made for her years ago one Sunday evening which we ate while watching some golden oldie on TV. She always brings up this meal as being such an unexpected delight!

My discovery of this dish, many years ago, was just as unexpected. A girlfriend and I had met up for a few drinks after work, which lead to a few more. The waiter kept asking if we wanted to eat something and eventually we felt bad and ordered the cheapest thing on the menu just to placate him. What we received was a dish of plain steaming hot pasta with three small bowls on the side containing chilli in olive oil, garlic in olive oil and freshly grated parmesan cheese. Initially we thought it was a joke… but too shy to say anything we spooned over the sides onto the pasta and started to eat. What a revelation! This is a truly alchemic combination. So many years later the two of us still giggle about that evening as we were in ecstasies over this absurdly simple meal.

Over the years I have tried to improve on this dish by adding cherry tomatoes, crispy bacon bits, chopped basil or sundried tomatoes and I can honestly tell you that they add nothing. It is at its best just like that.

This recipe is at its best when the ingredients you use are the best you can afford. I have however made it with stock standard ingredients and it is still awesome.


Pasta with garlic, olive oil and chilli

Serves 2 with enough for seconds (and you will have seconds)


250g of your favourite spaghetti, linguine or tagliatelle, cooked and drained

2 large cloves of garlic

2 medium sized chillies

¼ - ½ a cup of olive oil

1 tsp of salt

50g of parmesan, grana padano or pecorino, grated


While you pasta is cooking, chop or slice up your chilli and garlic (chopped disperses the flavour better, sliced looks pretty) and combine them with the olive oil and salt.

Drain the pasta, toss through the chill and garlic oil and serve scattered with loads of parmesan.


Friday, November 18, 2011

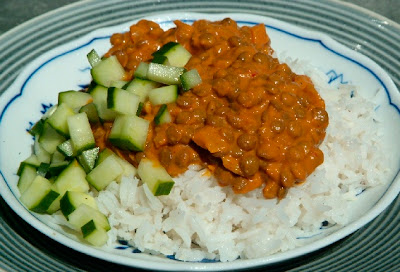
Indian comfort food!

So I said that dahl (lentils) and rice was all I’ve been eating lately cause of my dodgy tummy, and that it wasn’t really blog worthy. Well, I have changed my mind. Mild lentil curries served with soft steamed rice must be my ultimate comfort food. I have eaten this combination in various forms for the last six days and am not sick of it yet. A friend came to visit me yesterday, so I decided not to deviate from my theme however just to make a slightly more sophisticated version.

As I made this curry I was keeping one of my favourite dishes at Kebab Mahal in mind and even if it’s not quite the same, it was damned delicious and as with most curries tasted even better today. Use it as a side dish to a meaty curry or as the main event if you’re a vego or just enjoying a meat free meal. It is such a satisfying meal.

Super yum lentil curry

Makes 4 main course portions

1 Tbsp of oil

1 onion, finely chopped

2 cloves of garlic, finely chopped

1 Tbsp of finely chopped ginger or ginger paste

1 Tbsp of butter

2 Tbsp of paprika paste or powder

1 tsp of cumin

1 tsp of coriander

1 tsp of turmeric

1 tsp of garam marsala

½ tsp of chilli (more if you like it hot!)

½ tsp of salt (more if you’re me)

100g of tomato paste

2 tsp of lemon zest

½ a cup of cream

3 cups of cooked lentils

½ a cup of yogurt

In a medium pot fry the onion, garlic and ginger until soft and golden. Add the butter and spices and fry for a minute. Add the tomato paste, lemon zest and cream and simmer while stirring for minute. Add the lentils and simmer till warmed through. Switch off the heat and add the youghurt.

Serve with basmati rice, roti and sambals.

Tuesday, November 15, 2011

Ramblings from my bed…

Today I write from my bed. I have just returned from almost a month of non-stop training in Joburg, and as much as I love Joburg (and I really do); Joburg does not seem to love me. Every time I head up there I am plagued with tummy ailments, and the bug I got before leaving on Friday has followed me home. So to say I am less than enthusiastic about food right now is an understatement. My blessed husband to be has been feeding me dahl and rice which seems to be exactly what my stomach needs right now but not the most blog worthy dish (debatable).

It may be totally unfair to blame Joburg on my current state of malaise as moderation is not a virtue I have been blessed with. When I teach, I taste, eat and enjoy everything I work with. And while up in Joburg apart from training at least 4 – 5 recipes every day, I spent a fair amount of time exploring the eateries, markets, festivals and was entertained by fabulous people in fabulous places. So it may be fair to say that I am experiencing a bit of system overload.

Many of the homes I train in are the homes of overextended business people. They are on the go all the time, eat out and are entertained a lot, they are on the cutting edge all the time. When they come home, all they want is simple home cooking. Simple flavours and ingredients; comfort food, with flavours that remind them of a time in their lives which was not as stressed and complicated.


The requests I got on this trip were all about simple stews, meat balls with mash and gravy. Traditional chicken soup; freshly baked bread. Filling salads with loads of tasty ingredients, chocolate cake, Asian noodle bowls. All these request had ‘end of the year fatigue’ written all over them. People are tired and want to come home to good old fashioned cooking. My one client asked me to recreated two recipes of dishes which her late mother used to make for them as kids. What a privilege.

I think I feel the same way today, I want to return to some seriously simple eating. I want to be conscious of what my body and soul need and give it that. I want to focus on freshness and lightness. Damn, but as I type these words my mind is saying 'what about Christmas baking?’ – Okay, I’ll file the Christmas baking under food for the soul! I love Christmas baking while listening to Frank Sinatra and Bing Crosby... ohhhh I can’t wait!

Tuesday, November 8, 2011

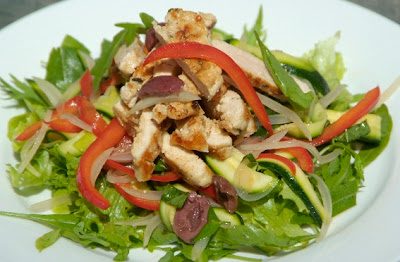
Marinated chicken salad


This is a salad I have making for many years and it has been modified and adapted often to suit my tastes and fridge stock. But the recipe below pretty much is what I consider to be the perfect combination.

It is ideal as a main meal served with crusty bread for a light lunch or supper. When I make it as a side salad to a meaty main, I usually replace the chicken with feta or toasted nuts.

I also consider this salad to be ideal for people who aren't crazy about salad as it has great robust flavors and lots of substance, in contrast to the light leafy variety.

It can also be prepped ahead of time and just assembled when needed, which makes it perfect for entertaining.

Lemony chicken and marinated veggie salad

makes one main meal portion and three side salad portions: increase as needed.

1 handful of lettuce leaves of your choice.

For the chicken

1 large free range chicken breast, tenderised

1 tsp of olive oil

1 tsp of lemon juice

1 tsp of olive brine (the juice the olives come in)

¼ of a garlic clove, finely chopped

½ tsp of fresh thyme, finely chopped (¼ tsp of dried thyme)

½ tsp of fresh ginger, finely chopped

¼ tsp of salt

Add some chilli if you like a zing

Combine all the marinade ingredients and rub the tenderised breast with it. Leave this in the fridge until ready for use.

For the marinated veggies

2 baby marrows, thinly sliced

¼ red pepper, thinly sliced

¼ onion, thinly sliced and submerged in boiling water for a minute then drained

6 black olives, pitted and broken up a bit

¼ of a garlic clove, finely chopped

4 basil leaves, shredded

1 tsp of olive oil

1 Tbsp of olive brine (the juice the olives come in)

2 tsp of lemon juice

¼ tsp of salt

Combine all the ingredients in a mixing bowl and toss till they are coated in marinade. Leave this in the fridge, tossing from time to time as you think of it.

For the chicken, heat a dash of oil in a pan and get the pan searing hot. Fry the chicken for about 2 minutes on each side until cooked through and golden brown. Set the chicken aside and allow it to cool in the fridge.

Assemble the salad just before serving. I placed the salad leaves on a plate, topped this with the marinated veggies and stacked the chicken breast, which I had sliced thinly, on top. There should be enough flavour not to need extra dressing.

Wednesday, November 2, 2011

Lamb glorious lamb

Lamb has been a central feature of my cooking recently. My favourite braised lamb has been cooked, for friends and taught to my clients, repeatedly with over whelming success in the last few months. It is so deliciously succulent and tender and the gravy is just tangy, savoury and silky. A truly lip licking meal.

So considering the time for family, friends and feasting is nearly upon us, give this recipe a try. You will not be disappointed.

A few things to consider for the success of this dish – do not short cut on the timing, it needs slow and long cooking. The meat needs to be covered with braising fluid but if that is not possible it needs to be turned occasionally. A good roasting pan, casserole dish or oven proof pot with a well fitting lid are ideal but covering the meat with tin foil is also acceptable – it’s just a bit of pain to lift the foil, turn and baste the meat and reseal the foil repeatedly, but it still works.

You can improvise on the braining fluid flavour as you like, the below is just a suggestion. I love adding red wine and different herbs and whole grain mustard, using up veggies in the fridge and herbs from my garden. I have used the same method with beef and pork and added things like apple juice, cider, cranberry preserve and sage as elements of my braising fluids.

Yum… now I’m getting hungry for lamb again and it’s not even lunch yet.

Braised rolled shoulder of lamb

1.5kg deboned, rolled shoulder of lamb (leg is also good)

¼ cup of olive oil

1 large onion, peeled and chopped

4 cloves of garlic, peeled and chopped

1 medium rib of celery, finely chopped

1 large carrot, peeled and grated

1 x 400g tinned tomato

1 – 5 cups of lamb stock (enough to fit the dish you are using leaving 2cm space from the brim)

1 Tbsp of fresh rosemary (½ that measure if dried)

½ Tbsp of fresh thyme (½ that measure if dried)

1 Tbsp of freshly ground black pepper

For the gravy

4 Tbsp of flour

1 Tbsp of Dijon mustard

Salt and pepper to taste

Pre-heat the oven to 150°C and place the rack in the middle of the oven.

In a heavy pan, heat the oil over high heat, then add the lamb and sear it thoroughly, using a pair of tongs to turn it. When a nice brown crust has developed on all sides of the meat, remove it from the pan and set it aside.


Add the onions and garlic to the pan, after a few minutes add the carrots and celery. Fry until the onion is slightly translucent.

Combine all the remaining ingredients in a brassier or casserole dish. Then add the lamb, onions and garlic mixture and cover with a tight-fitting lid and transfer to the oven for 4-5 hours or until the lamb is tender.


Remove the pot from the oven; take out the lamb and set it aside, covered, while you make the gravy. You should see a layer of fat on top of the braising liquid. You will use this fat to thicken the sauce. Skim off as much fat as you can, and save about ¼ cup of it. You can discard the rest, as it would make the sauce too greasy. If there isn’t enough fat add butter or oil to get the required amount of fat.

Strain the braising fluid through a sieve and throw away the chunky bits. Heat the fat in a separate pan, then whisk in the flour until a paste forms. Fry for a few minutes, stirring continually. Remove from the heat and stir in 2 cups of braising fluid. Whisk the two together until combined. Return to the heat and whisk until it thickens. Add as much braising fluid as is needed to get the sauce to the desired consistency. Season with mustard, salt and pepper to taste.


Slice the lamb across the grain, arrange slices on warm plates, sauce generously and serve right away


Sunday, October 23, 2011

Tiramisu with hints of bourbon and orange.


Yesterday was the third time I have made tiramisu in a month and each time has been sumptuously satisfying. I have added a few little twists to the traditional recipes but one of my most traditional Italian friends even said that they were an enhancement.

It is sin on a plate, so just accept that before you start, go with it knowing that you don’t do this every day. It really will end off any special occasion meal with little sighs of contented delight. It is rich and velvety, and I feel that my addition of a little bourbon and orange cut the richness just enough to justify eating a few more mouthfuls straight from the bowl after you are done with your first helping.


Tiramisu with whisky and orange
Serves 6 - 8

100g of your preferred strength of dark chocolate, broken up
1/8 tsp of salt
175g Ladies fingers (boudoir biscuits) or more if you like
1 cup of hot strong coffee, sweetened to taste
A few splashes of whisky, I used Makers Mark whisky
4 large eggs
100g of castor sugar
750g of mascarpone cheese
2 oranges
Coco powder or dark chocolate to cover the top of the dessert

Pour the hot sweetened coffee over the chocolate in a bowl long and wide enough for you to soak the ladies fingers in (you can do it in batches too). Allow the chocolate to melt. Pop it into the microwave for 30 seconds at a time if it needs a bit of extra heat. Stir it lightly with a whisk to combine. Add a splash of whisky (or two if you’re feeling it) and the juice and zest of one of the oranges.

Separate the eggs into two bowls. Whites in one, yolks in the other. Add the sugar tothe yolks with a splash of whisky and beat until the sugar has dissolved and themixture is pale and creamy. Mix in the mascarpone and the zest of one of the oranges.

Whisk the whites with a pinch of salt until they form stiff peaks. Add the whites to the yolk mixture and gently fold it in with a spoon until well combined.

Lay the ladies fingers in the chocolate and coffee mixture and allow them to soak up the mixture for a few minutes, turning them if needed to get even coverage.

You can prepare this in portion sized bowls or a medium sized casserole dish. I like to get two layers going in a deeper dish but a single layer in a larger dish is also fine.

Start by spooning a thin layer of the mascarpone into the dish, lay the soaked biscuits across this layer, then top again with mascarpone mixture and again with biscuits and end off with a thick layer of mascarpone mixture.

Allow this to settle in the fridge for a few hours or overnight. Before serving, dust with a thick layer of coco powder or grated chocolate.